
什么是hexo-asset-image?
- Give asset image in hexo a absolutely path automatically.
- CodeFalling/hexo-asset-image
安装hexo-asset-image
npm install hexo-asset-image --save
修改hexo配置
修改hexo根目录下的
_config.yml文件,添加如下配置:1
post_asset_folder: true
修改hexo-asset-image插件
- 修改
node_modules\hexo-asset-image\index.js:1
2
3
4
5
6
7
8
9
10
11// 注释掉以下代码
// if(srcArray.length > 1)
// srcArray.shift();
// src = srcArray.join('/');
// $(this).attr('src', config.root + link + src);
// console.info&&console.info("update link as:-->"+config.root + link + src);
// 添加以下代码
$(this).attr('src', src);
console.info&&console.info("update link as:-->"+src); - 修改后的
index.js文件如下: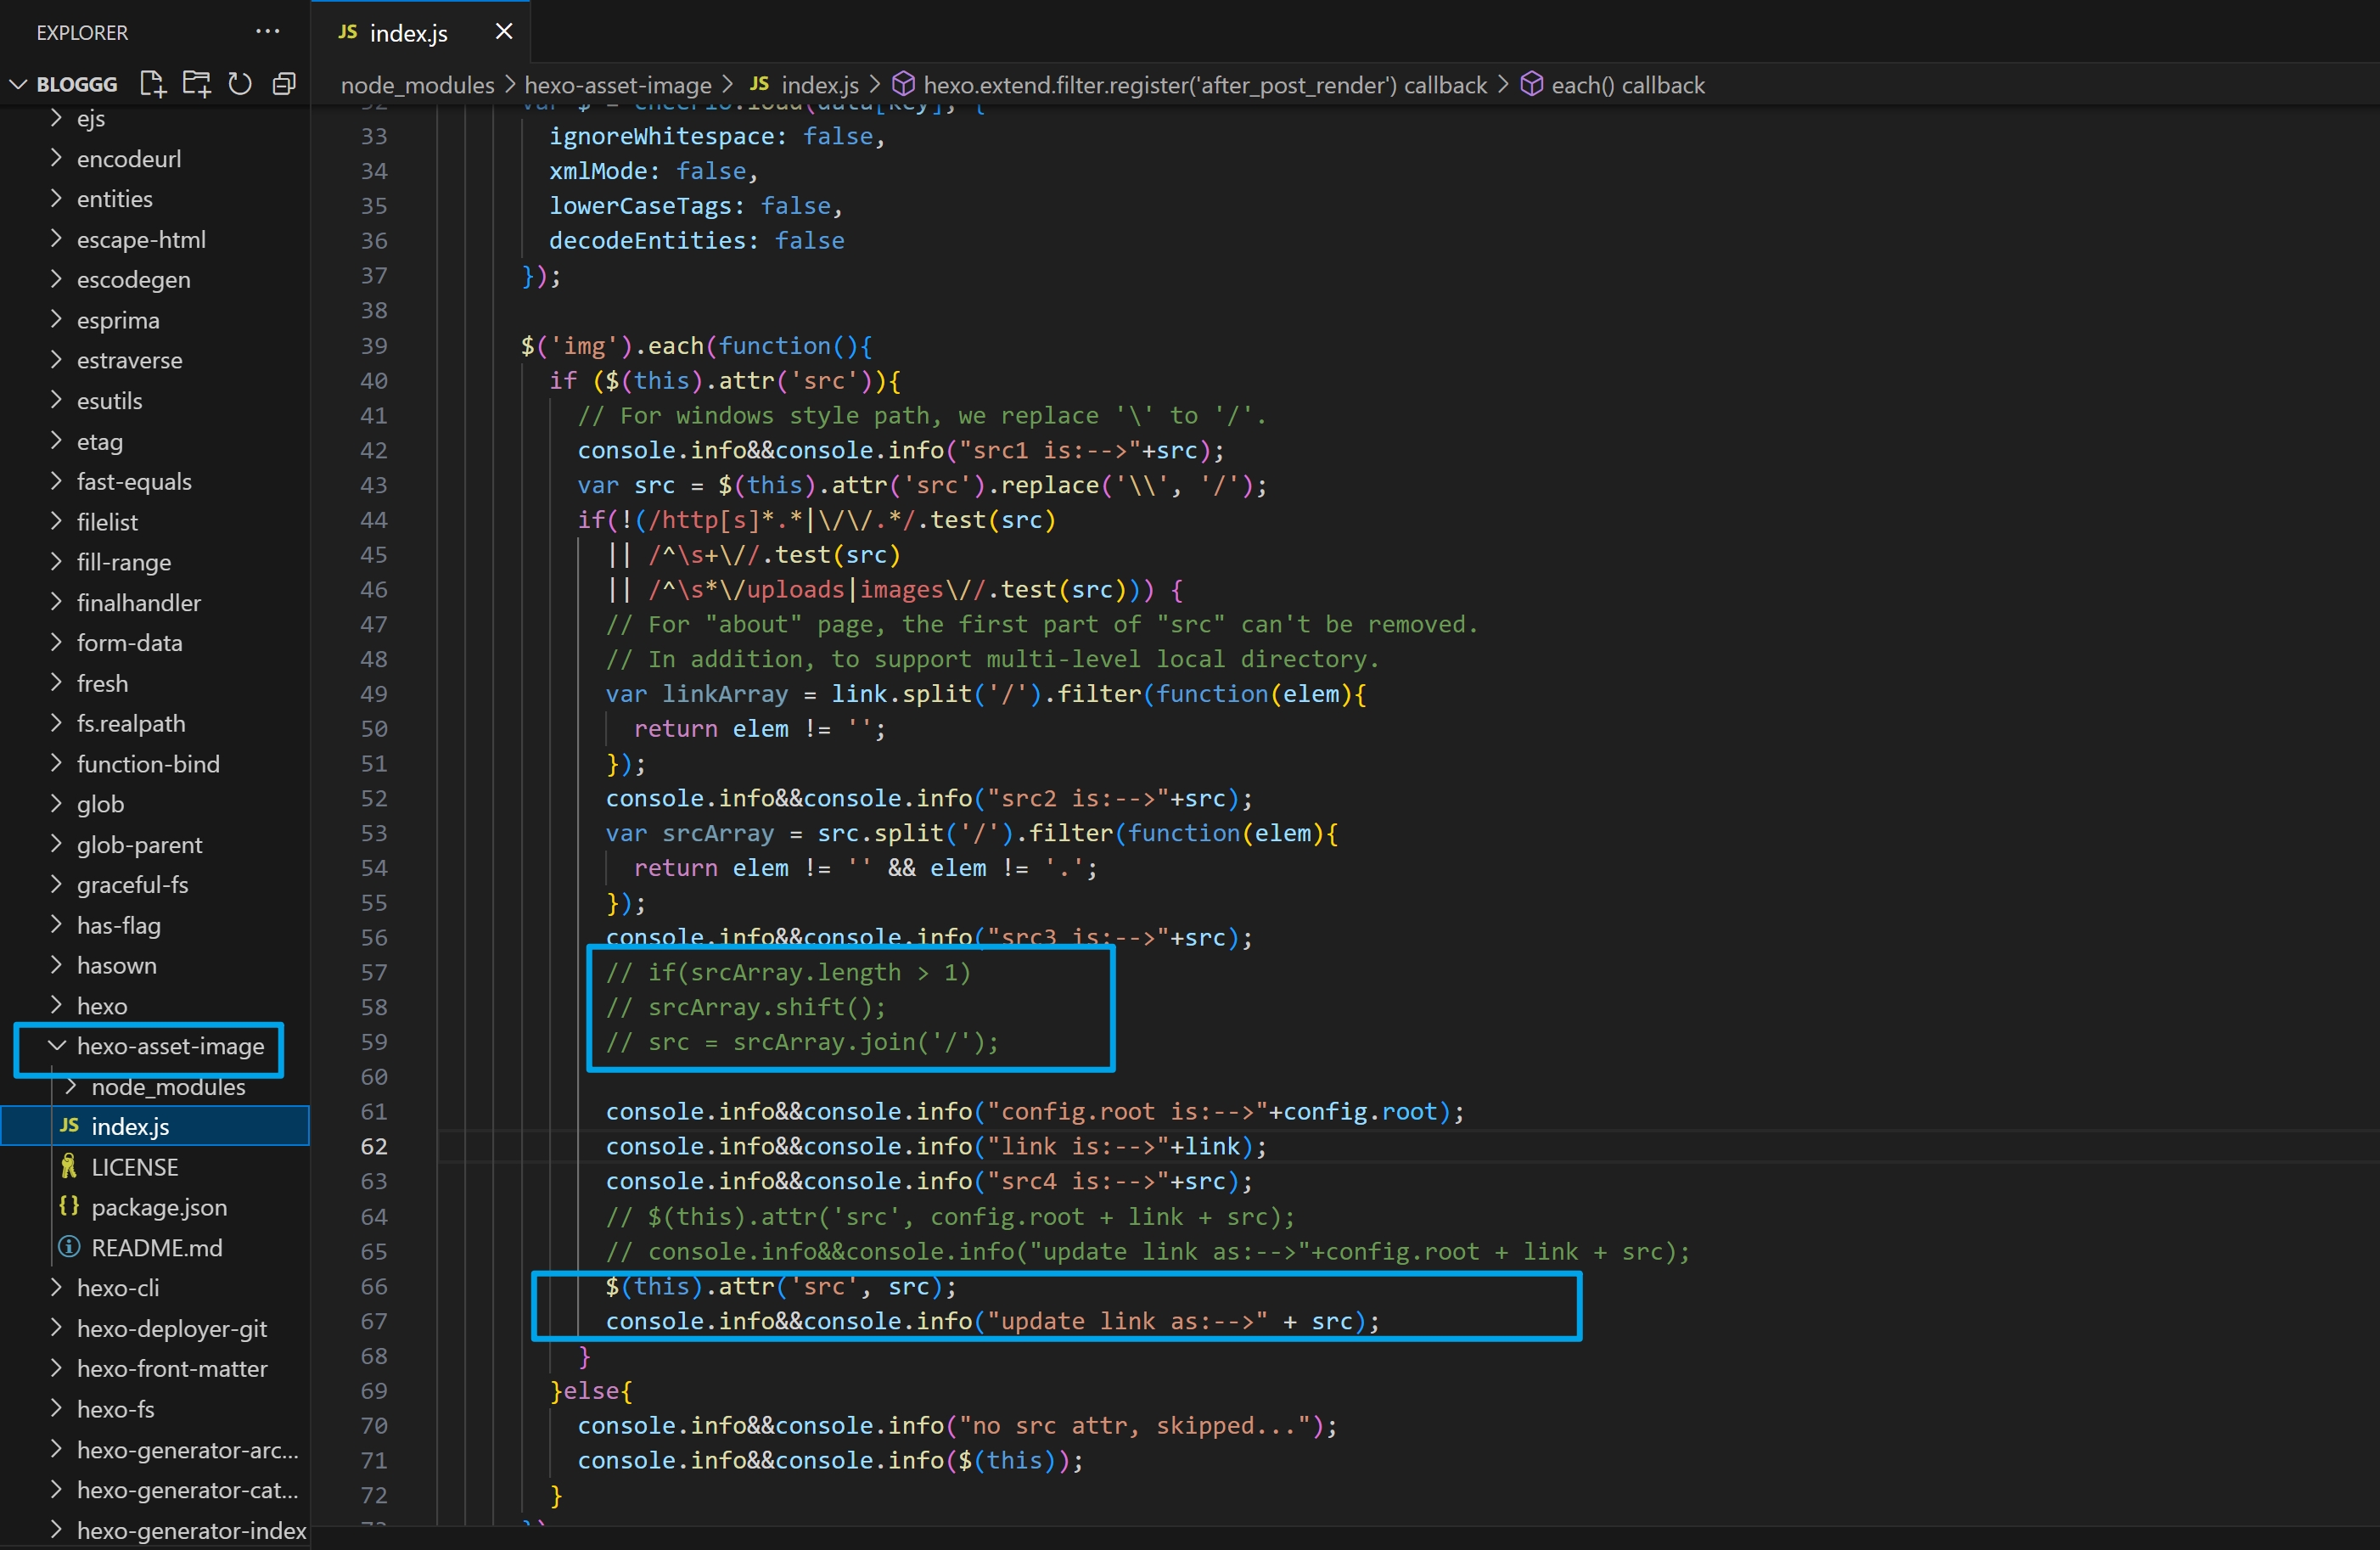
使用hexo-asset-image插入图片
- 创建新的文章,例如
hexo new "xx",会在source/_posts目录下生成一个md文件以及同名文件夹 - 示例:
1
2
3
4
5
MacGesture2-Publish
├── apppicker.jpg
├── logo.jpg
└── rules.jpg
MacGesture2-Publish.md - 在md文件中插入图片,例如:
,图片名称就是图片路径